Follow the given below steps for creating a database in Oracle 12c.
Step 1 : To create a database, go to the start button of windows 10 and click on All apps -> Oracle-OraDB12Home -> Database Configuration Assistant.
Step 2 : You will get wizard of Data Configuration Assistant and choose the option Create Database, for creating a data base and click on Next button.
Step 3 : In Creation Mode, if we choose the option create a database with default configuration. Fill the Global Database Name and Administrative Password, this password is required at the login time and click on Next button.
Step 4 : In Database Template, choose the General Purpose or Transaction Processing option and click on Next button.
Step 5 : In Management Options, check the option of Configure Enterprise Manager(EM) Database Express option and click on Next button.
Step 6 : In Database Credentials, for security reasons, you must specify password for user account in the new database. Choose any option and click on Next button.
Step 7 : In Network configuration, check the option of Listener 12 c and click on Next Button.
Step 8 : In Storage location, choose any option for storage and click on Next button.
Step 9 : In Database options, choose any database schemas and click on Next button.
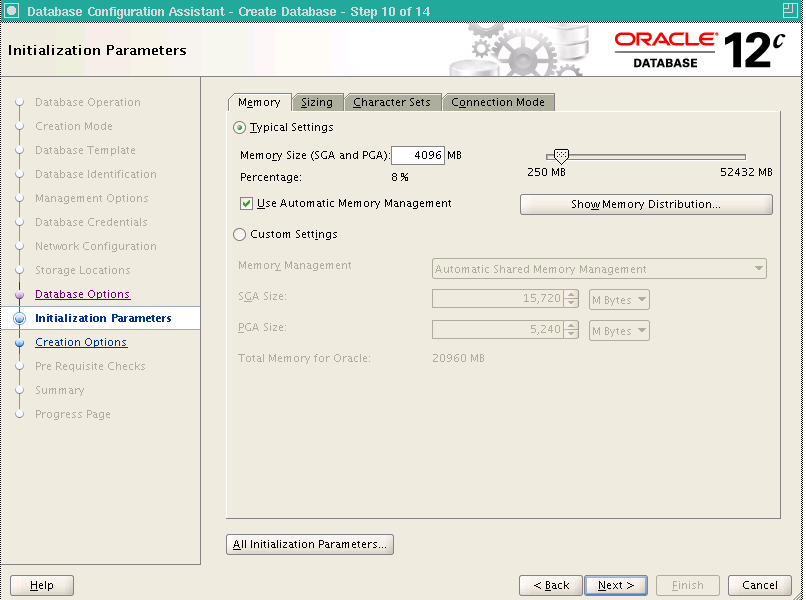
Step 10 : In
Initialization Parameter, by default settings are selected, click on
Next button.

Step 11 : In Creation Option, check the option of create database, click Next button.
Step 12 : In Summary, it is the over all summary of database, click on Finish button.
Step 13 : In Progress page, Installation will be in progress.
Step 14 : If you click on the Password Management, you can manage the password of SYS as SYSDBA or directly click on Exit button.
The database creation is completed.